Easy Cheesy Braided Spaghetti Bread Recipe

This Unique Spin on a Classic Dish Will Addict Your Taste Buds Immediately!
As usual, I was poking around on Pinterest, and once again...I stumbled on a unique recipe I just HAD to try. Cheesy Braided Spaghetti Bread. Doesn't the name alone peak your curiosity?
At first glance, this recipe may seem a bit involved, but I assure you, it is not. (Believe me, I managed it and I'm extremely uncoordinated.) I took pictures of each step while I constructed this creation, just to show you how unbelievably easy it is. I have also included a video showing the dough braiding technique, which I found to be super helpful.
I really enjoyed creating this dish because it was a new technique for me to try out and also a great spin on your traditional spaghetti and sauce with bread on the side. I definitely recommend this recipe to all out there who are in the mood to try something new that is easy, yet unique.
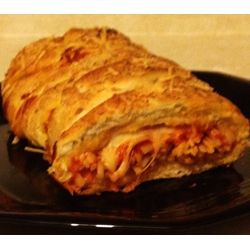
I think this yummy Cheesy Braided Spaghetti Bread is probably the prettiest meal I've ever made. Not only was this meal absolutely mouth watering, but I felt really proud of my end result. (This is an accomplishment for me, my cooking usually tastes pretty good, it's just not always so pretty to look at!)
Have You Ever Heard of Cheesy Braided Spaghetti Bread Before?
I found this scrumptious dinner idea online and made my own revisions based upon what I had on hand and also taking my own personal tastes into account. You can find the original recipe by visiting Love.Bake.Enjoy.
For those who are "sauce fanatics," like myself, I would highly recommend serving this bread with a side of spaghetti sauce, garlic butter, or alfredo sauce to add that extra kick of flavor!
I honestly loved this idea so much that I am going to continue to create various kinds of stuffed bread. Add your own personal touch and I hope you will enjoy this recipe as much as I did!
Image Appears Courtesy of...Myself!
Ingredients
- 1 Loaf of Bread Dough
- 6 oz Cooked Spaghetti
- 1 Cup Spaghetti Sauce
- 8 oz Shredded Mozzarella
- 1/4 Cup Melted Butter or Margarine
- 1/2 Tsp Garlic Salt
- 1/4 Tsp Dried Parsley
- 1 Tbsp Shredded Parmesan Cheese
Instructions
- 1. Begin by preheating your oven to 350 degrees (F).
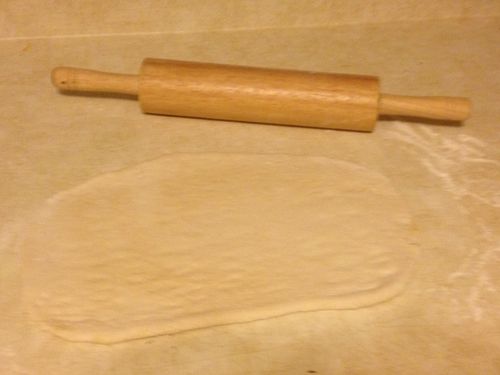
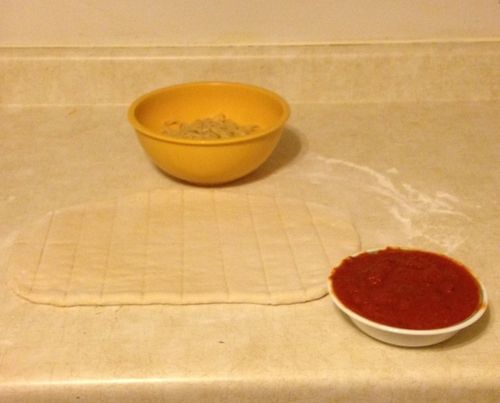
- 2. Use a rolling pin to flatten out the loaf of bread dough into a roughly rectangular shape. (It may help to sprinkle the counter top with flour and also coat the rolling pin in flour to avoid sticking.
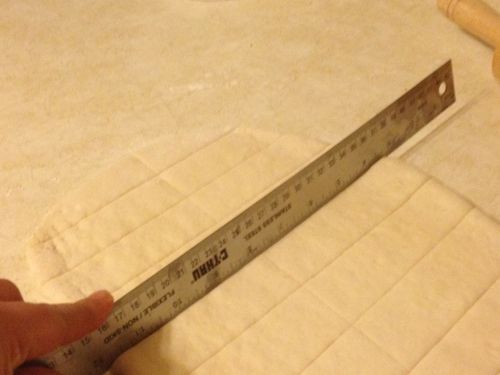
- 3. After dough is flat, use a ruler to make indentations in the dough from one side to the other, approximately 1 1/2 inches apart.
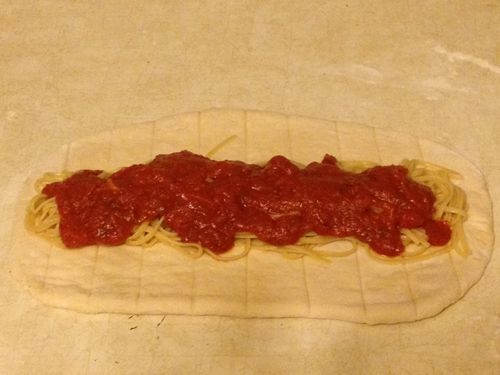
- 4. Lay cooked spaghetti noodles in the middle of the dough.
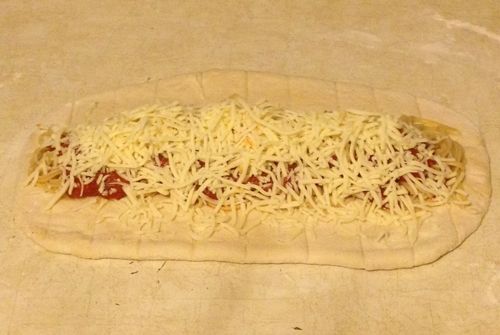
- 5. Pour the sauce over the noodles and add the mozzarella over the sauce.
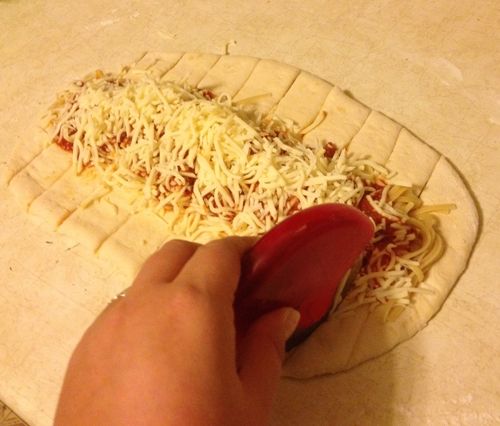
- 6. Use a pizza cutter and cut the dough on the indentations created with the ruler all the way up to the filling.
- 7. Before starting to braid the dough, the ends of the loaf need to be created. Beginning on one side of the loaf, take the end section and fold it over. Press the end section down onto the next section of dough, creating a pocket at the end. Repeat this process on the other end of the dough. (See pictures below to get a better visual if the directions seem confusing.)
- 8. Once the ends of the loaf have been created, you will start to braid the dough. Begin on one side of the loaf and work your way to the other end. Take the section of dough closest to the end pocket you created, pull across the filling, and stick it to the bread dough on the other side of the loaf. Now on the opposite side of the loaf, take a section and cross it over the center and stick it to the opposite side. Repeat this process until there are no dough sections remaining.
- 9. Carefully pick up the braided loaf and place on a cookie sheet covered with aluminum foil. (Make sure you spray the aluminum foil with cooking spray to avoid sticking, I found that out the hard way!)
- 10. Brush the top of the loaf with melted butter. Then add garlic salt, parsley, and Parmesan cheese.
- 11. Bake for 35 minutes at 350 degrees (F).
- Once the bread is done, let it cool for 5-10 minutes to make it easier to cut.
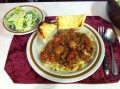
- Then, voila! Dinner is served!
Step by Step Directions Accompanied by Photos
All pictures on this page were taken by me and belong to me, unless otherwise stated. Please ask permission before using. Thanks.
Roll Bread Dough into a Rectangular Shape - (Sprinkle Flour on your Counter Top and Rolling Pin to Prevent Sticking)
Create Indentations in the Dough, Approximately every 1 1/2 Inches from One Side to the Other - (Don't Cut All the Way Through the Dough)
Time to Start Adding Our First Ingredients: Spaghetti and Sauce
Lay Spaghetti in the Middle of the Dough

Pour Your Favorite Spaghetti Sauce Over the Noodles
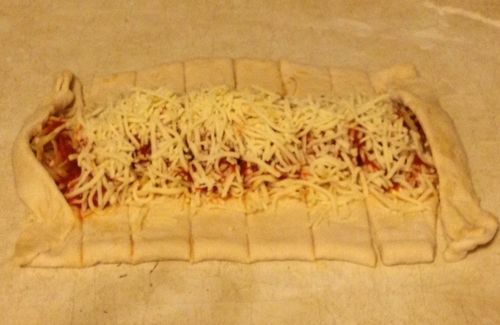
Sprinkle on Shredded Mozzarella - (Be Very Liberal with the Cheese, Cubed Mozzarella Works as Well)
Cut the Previously Created Indentations in the Dough with a Pizza Cutter
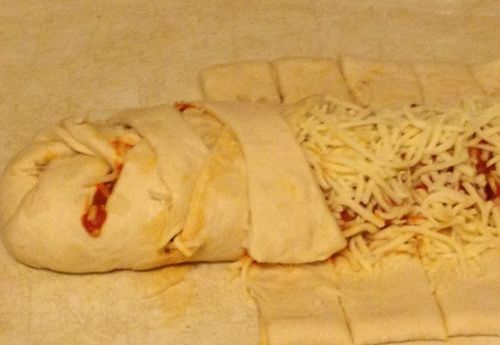
On Each Side, Fold Over the End Section of Dough and Press it onto the Next Section of Dough to Create the Ends
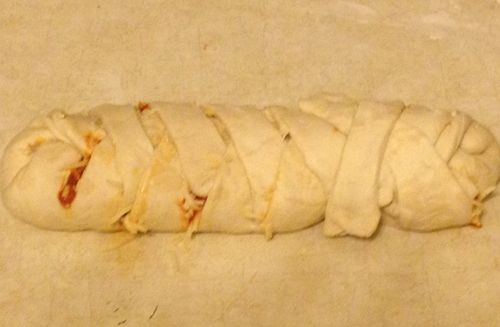
Begin Braiding the Dough - Alternate One Section of Dough From Each Side and Pull Tight Across - (It is EXTREMELY Helpful to Watch the Video Below to See the Br
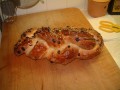
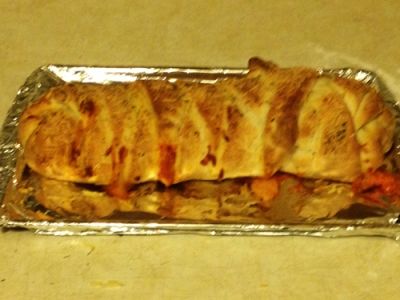
Once the Entire Loaf is Braided, Transfer Onto a Baking Sheet Lined with Aluminum Foil - (Spray the Aluminum Foil with Cooking Spray to Avoid Sticking)
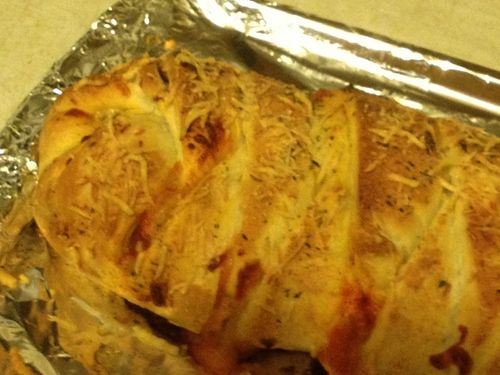
Brush the Top of the Loaf with Melted Butter, Then Sprinkle on the Garlic Salt, Parsley, and Parmesan Cheese

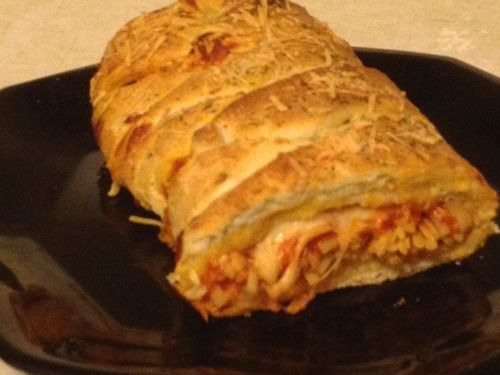
Bake the Bread at 350 Degrees for 35 Minutes
Allow to Cool for 5-10 Minutes, Then Cut, and Serve!